Guide for property managers
Video
Navigation
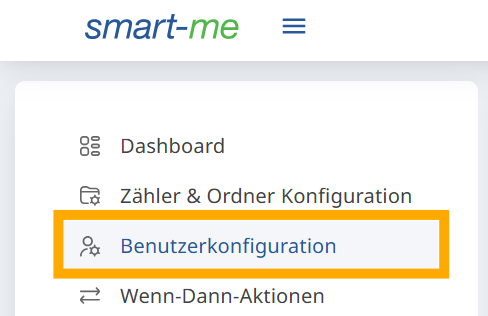
How to get to tenant access
smart-me home page -> User Configuration (Benutzerkonfiguration)
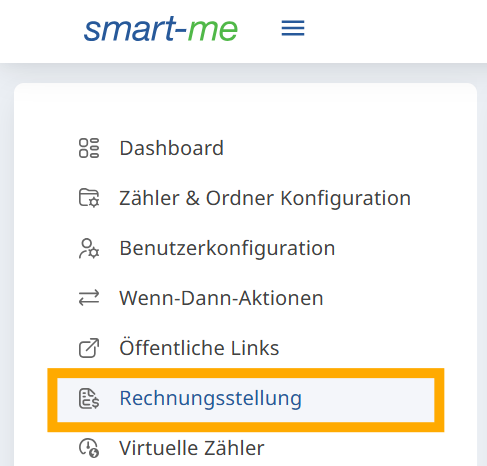
How to get to Billing
smart-me home page -> Billing (Rechnungsstellung)
Requirements and checks at handover
Note: Partners are the first point of contact for property management companies, unless the property management training with us has been attended.
-
Alarm (or agree on who takes care of it)
-
Virtual tariffs must be set.
-
The calculated date (virtual tariffs) is today.
-
VEWA has been set up, if present.
-
Tenant access has been set up, if agreed.
Global settings
-
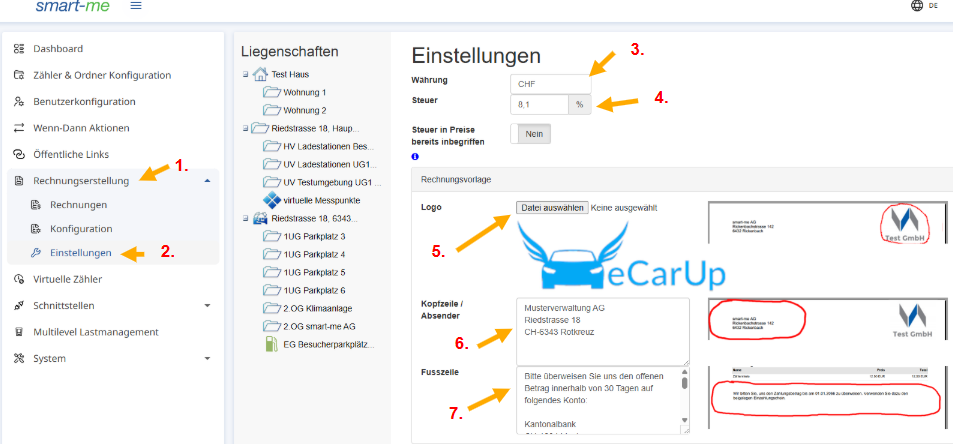
Billing (Rechnungsstellung)
-
Select Settings (Einstellungen)
-
Define the currency (CHF or EURO)
-
Define taxes (global); different taxes per tariff or other item can be defined in the respective tariff / other item.
-
Logo (max 1MB, 5000x5000 pixels)
-
Header (invoice issuer)
-
Footer (e.g. IBAN account number)
Change of tenant
How to create tenant access, carry out a change of tenant in smart-me Billing and renew tariffs.
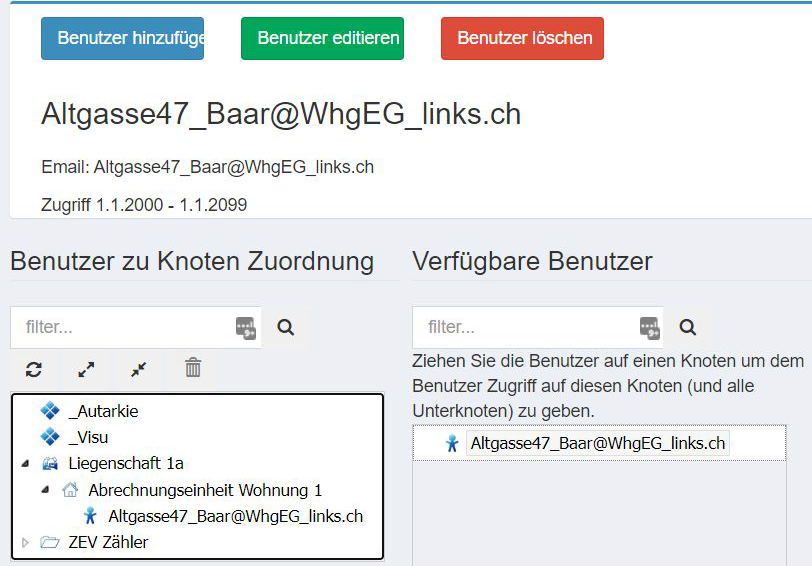
Creating tenant access
Create tenant
-
Navigate to "User Configuration" ("Benutzerkonfiguration")
-
Select "Add user" ("Benutzer hinzufügen")
-
Username and email address (Tip: best practice username = email address)
-
The email can be fictitious or real (Tip: make accounts fictitious, as in the example on the right)
-
Permission level (Tip: for tenants, “Read rights: Selected folders and all subfolders and meters” (“Leserechte: Ausgewühlte Ordner und alle Unterordner und Zähler”) is sufficient)
-
Validity of the access (Tip: access from = move-in date / access until: 31.12.2099)
-
Set password
-
Assign to the authorized node via drag and drop. (As a rule, the tenant gets access to the graphics, technical meters and their own apartment)
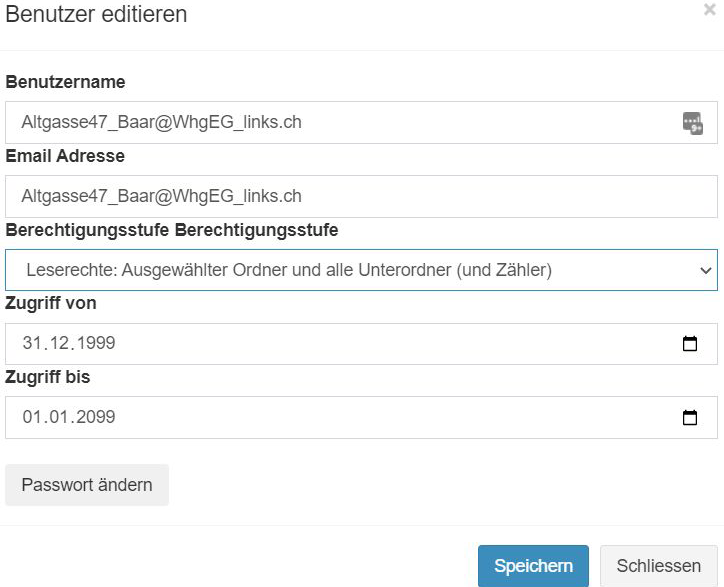
Changing tenant access
When a new tenant moves in, you can prevent them from accessing the old data.
-
Select and edit the user
-
Set access until to the move-out date
-
Alternatively, delete the tenant access
The change of tenant (Billing)
Billing unit
-
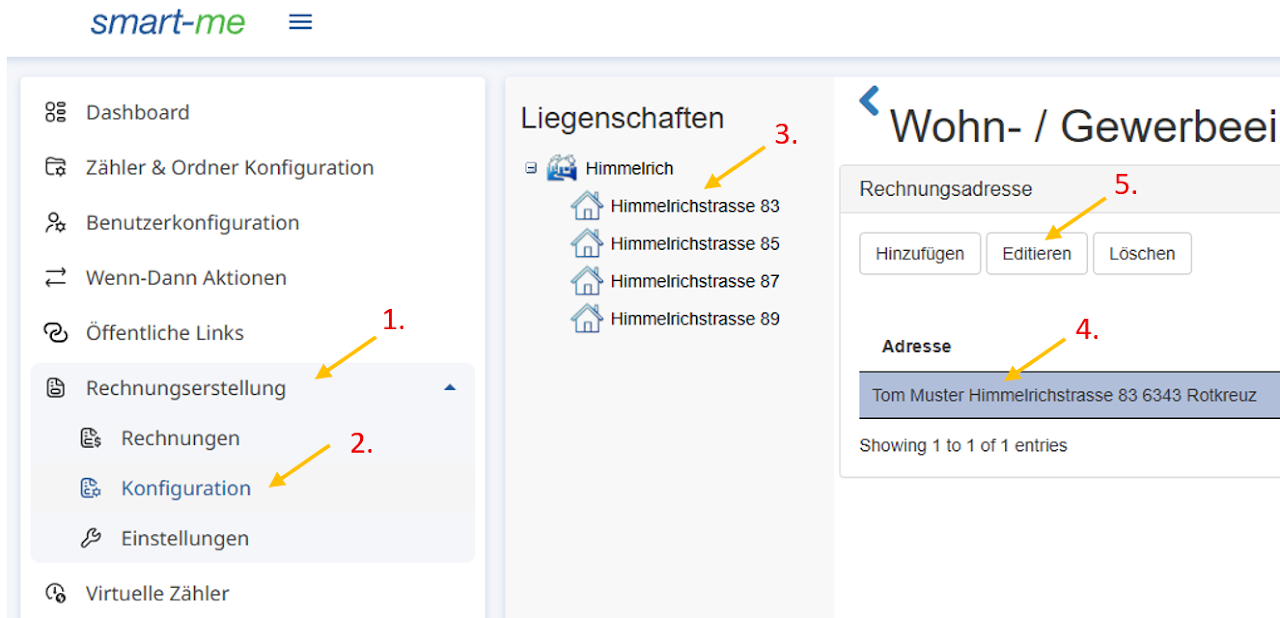
Billing (Rechnungsstellung)
-
Configuration (Konfiguration)
-
Select the billing unit
-
Select the existing tenant
-
Edit
-
Change valid until to the move-out date.
-
Add / edit invoice address
-
Name and address (or vacancy)
-
Email address for automatic invoice dispatch (optional)
-
Validity (valid from = move-in / valid until = 31.12.2099)
Defining the solar tariff
The general reference points
-
Solar tariff = 80% of the grid tariff
-
Energie Schweiz self-consumption guide: https://www.energieschweiz.ch/gebaeude/eigenverbrauch/
-
Changing the payment account
The payout account can be maintained in two places in smart-me Billing.
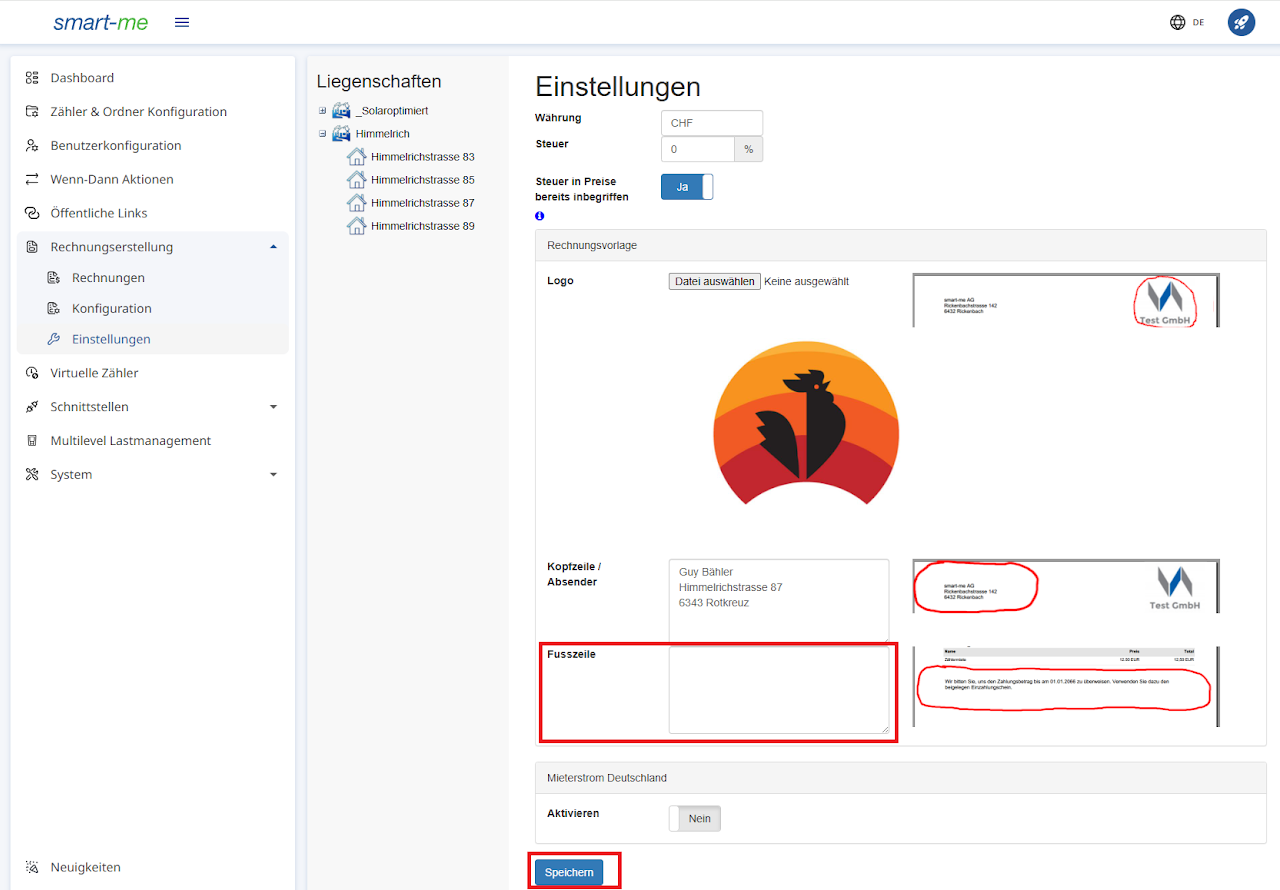
In the footer
-
Billing (Rechnungsstellung)
-
Settings (Einstellungen)
-
Footer (Fusszeile)
-
Save (Speichern)
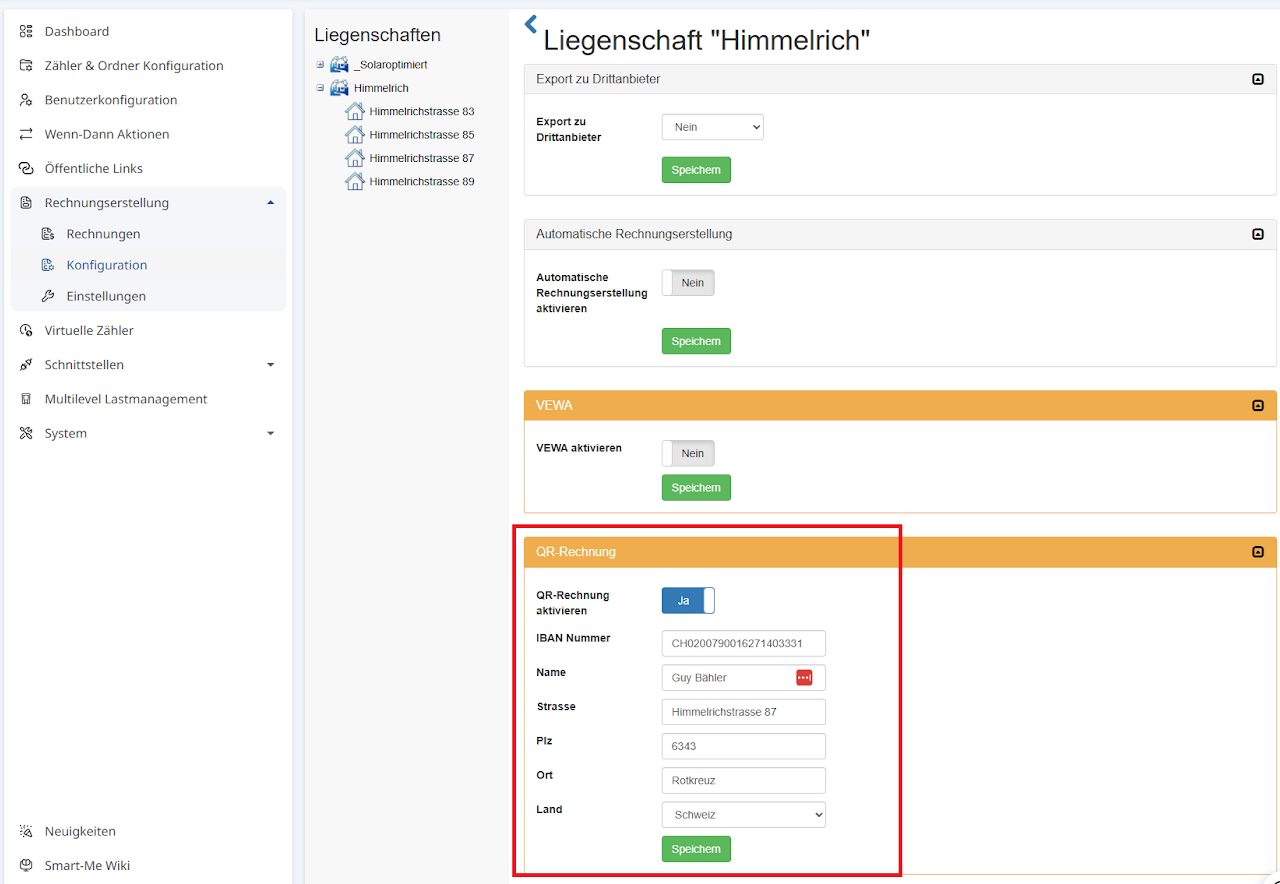
As a QR invoice
-
Billing (Rechnungsstellung)
-
Configuration (Konfiguration)
-
Section: QR invoice (QR-Rechnung)
Entering electricity tariffs
Grid electricity tariffs
-
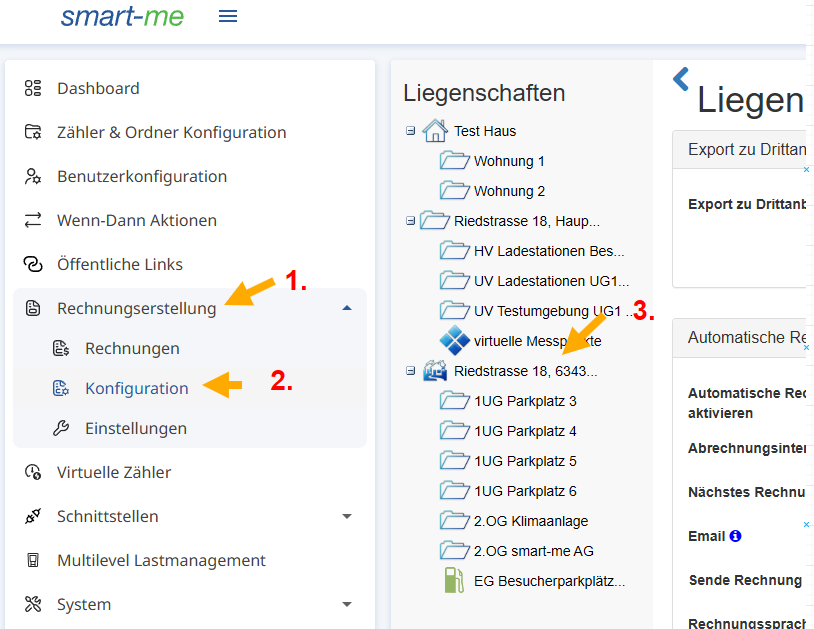
Billing (Rechnungsstellung)
-
Configuration (Konfiguration)
-
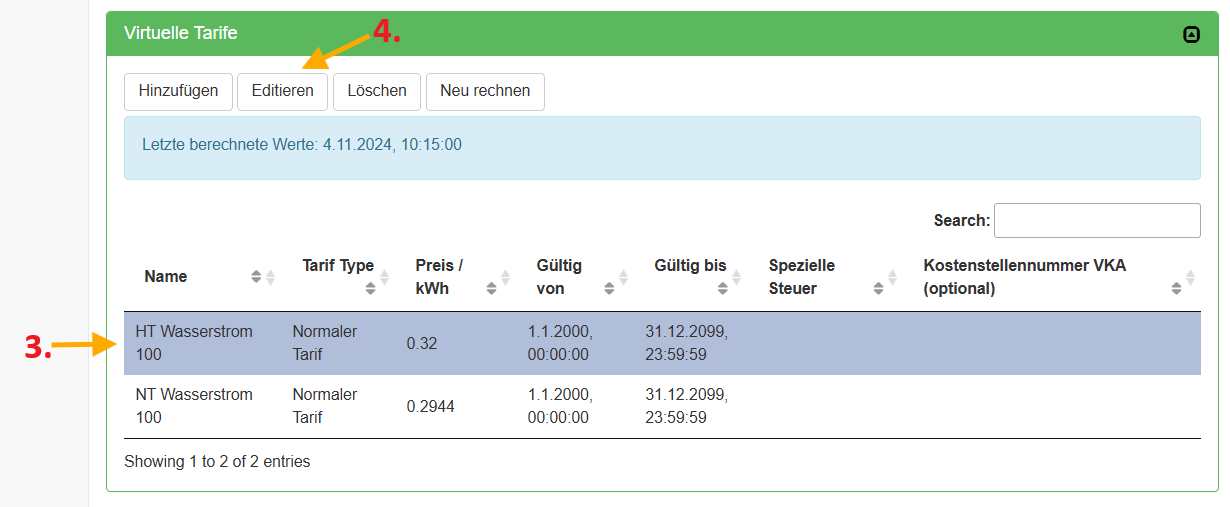
Select the property & select the virtual tariff
-
Edit
-
Adjust the price (CHF/kWh)
-
Adjust the special tax (if necessary)
-
Save (Speichern)
Note: If anything other than the price is changed (e.g. the name or the validity), you must click “Recalculate” (“Neu rechnen”).
Entering an other item
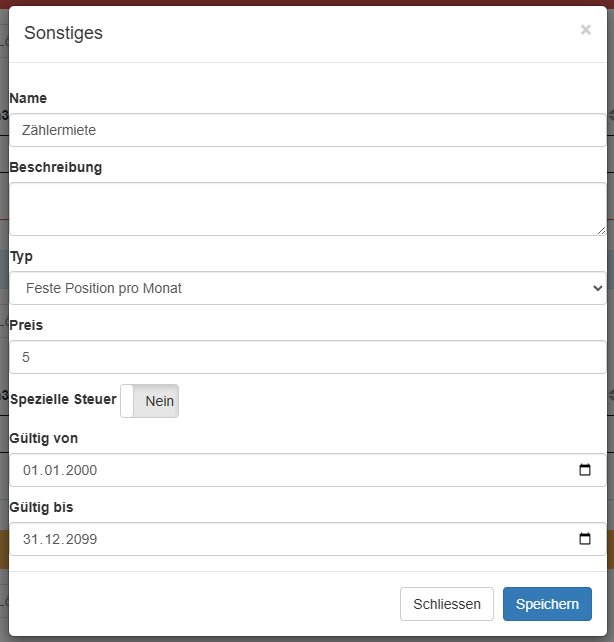
Other costs can be added in addition. General costs such as meter rental or administrative effort can be added at property level.
-
Select the property
-
Scroll all the way down to "Other" ("Sonstiges")
-
We recommend per month (adjusts dynamically pro rata)
Apartment-specific additional costs (additional meter rental or parking fees) can be added at apartment level.
-
Select the apartment
-
Scroll all the way down to "Other" ("Sonstiges")
Costs are not split, but added equally to everyone. Example: meter rental of the energy supplier 5CHF per month. 5x billing units -> 1CHF/month as an other item
Heat / domestic hot water tariffs
If VEWA is not used, the price components of the multi-energy meters must be added. With VEWA, these are overwritten.
Determining tariffs for heating and domestic hot water
- Set the period and add price components.
Creating an invoice
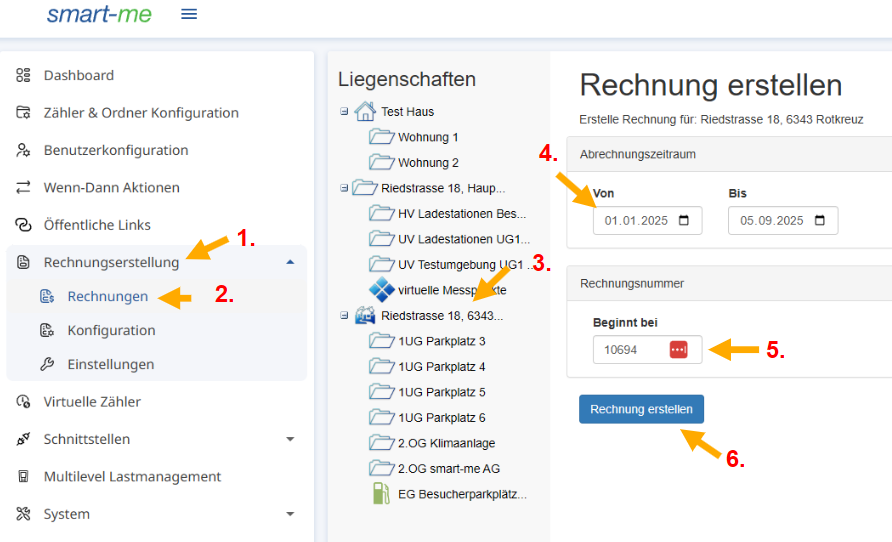
Creating an invoice (electricity only)
E.g. 01.10.2024 to 04.11.2024 can now be billed.
-
Billing (Rechnungsstellung)
-
Select Invoices (Rechnungen)
-
Select the property or billing unit
-
Define the billing period (note: the commissioning day and the current day cannot be billed)
-
Define the invoice number (then counts up)
-
Create invoice.
-
Make sure there are no warnings; if there are, please check with the installation partner unless the property manager training has been attended.
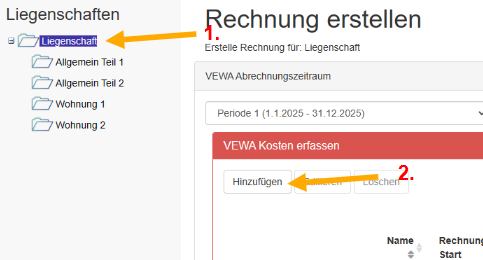
Creating an invoice (electricity and VEWA)
-
Navigate to the property.
-
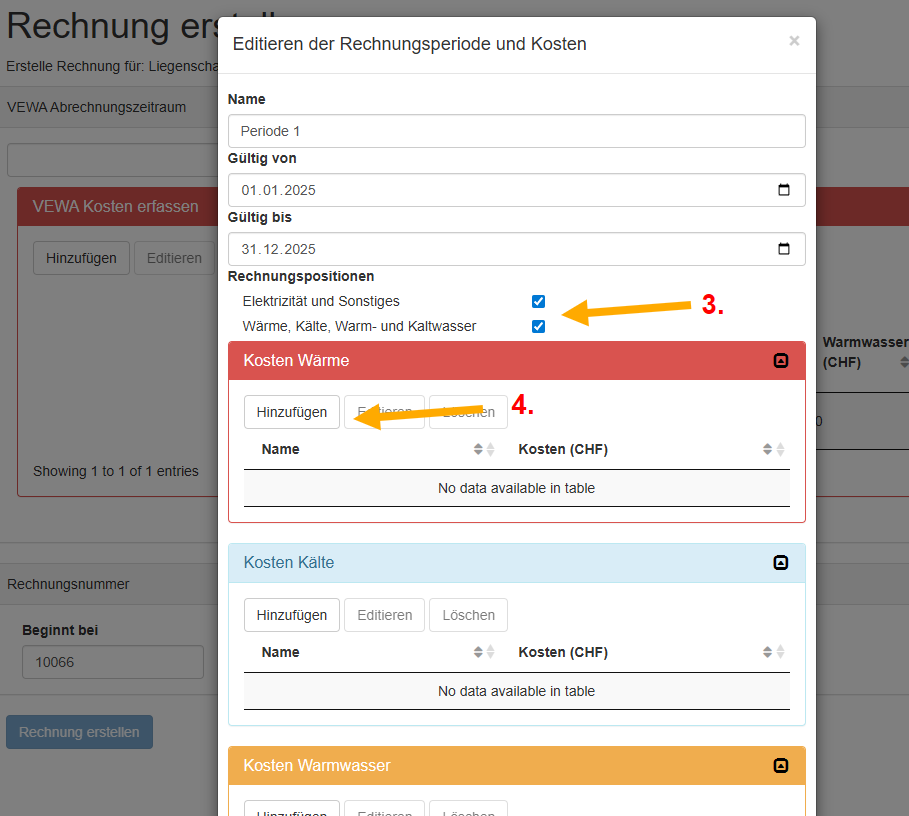
Edit and enter a new period
-
Select what is to be billed
-
Enter the costs for the individual items
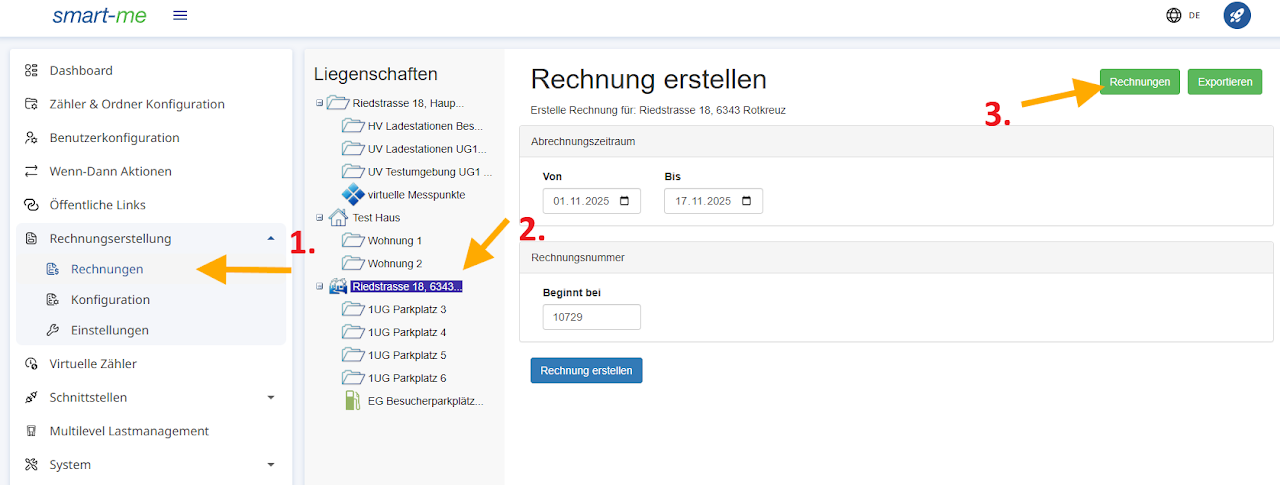
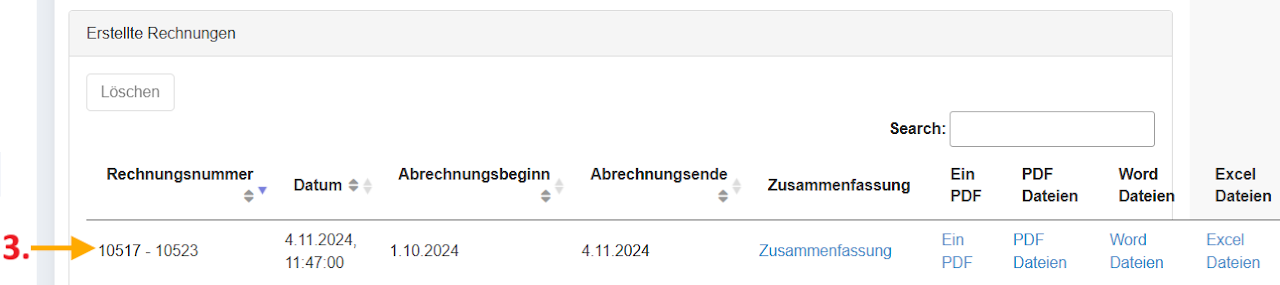
Viewing a created invoice
-
Billing (Rechnungserstellung) -> select Invoices (Rechnungen)
-
Select the property or an individual billing unit
-
View invoices and download documents in the desired format
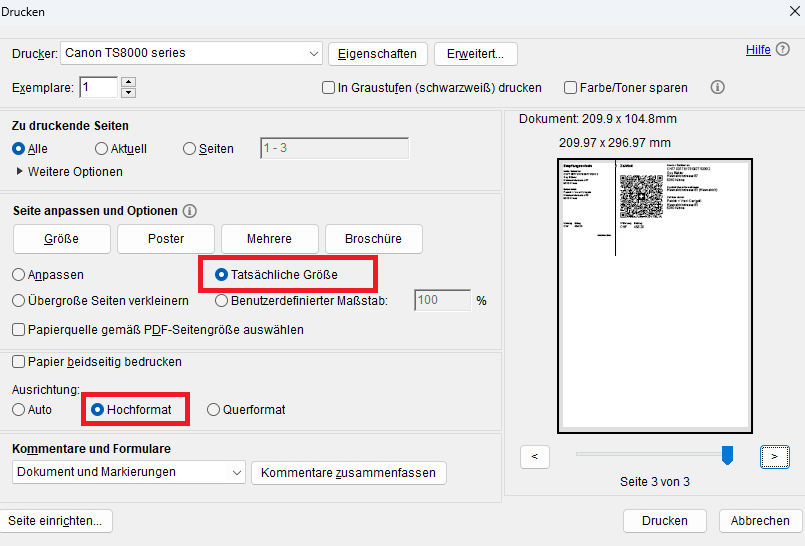
Changing the QR code invoice to portrait format
To print the QR code invoice correctly in portrait format, the following settings must be changed in the print dialog. Example with Adobe Acrobat Reader.
-
Enable actual size
-
Orientation: portrait
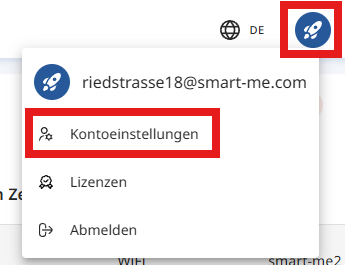
Changing the email address (account)
Note: An account with the new email must not already exist.
-
Click on the rocket.
-
Click on Account settings (Kontoeinstellungen)
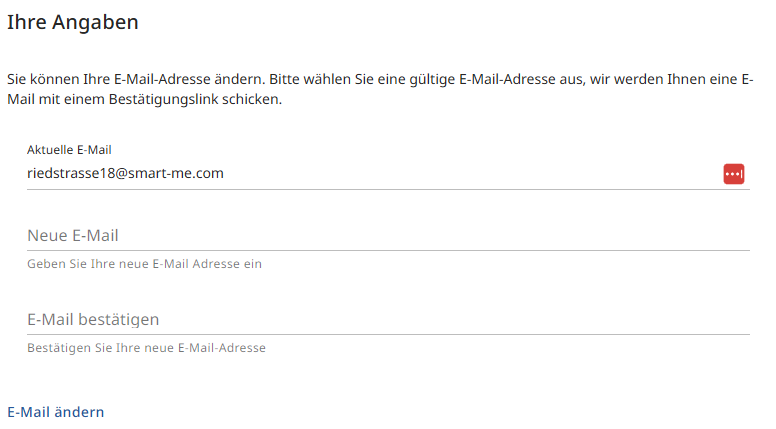
3. Enter the current email
4. Enter the new email, confirm it and click Change email (E-Mail ändern)
5. You will receive a confirmation link at the new email address.
Important: If this link is opened on another device, you must log in again with the old login details.
Transferring an account
Note: An account with the new email must not already exist.
-
Click on the rocket.
-
Click on Account settings (Kontoeinstellungen)
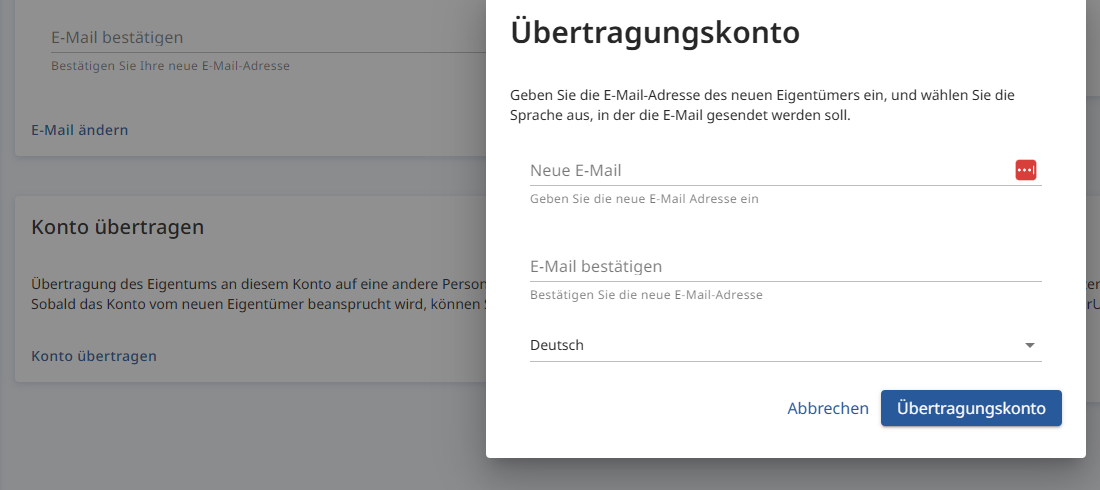
3. Click Transfer account (Konto übertragen)
4. Enter and confirm the new email.
5. Select the new language.
6. Click Transfer account (Übertragungskonto)
7. You will receive a link at the new email address to accept the transfer.
Important: The link is only valid for 6h. After that, the process must be started again.