Solar Manager
smart-me devices can be integrated directly into Solar Manager via the cloud. Virtual meters can also be imported.
Small update to SolarManager from August 2026
With the new SolarManager update, Picos are no longer controlled via their serial number but via the ID of the load management level 1 group.
In this short video, I show you step by step how this works so that you can configure the settings on the smart-me side correctly.
Good to know: the update makes single-phase charging at 6 A (approx. 1.4 kW) possible, which is ideal for smaller PV surpluses. You can find out how to configure this in the Solarmanager documentation.
solarmanager_update_2026.mp4
Solar Manager offers several options for using the smart-me meter and Pico charging stations:
-
As a smart meter or balancing meter directly after the utility meter
-
As a consumption measurement for devices such as charging stations, heat pumps, etc.
-
As a production measurement for PV generation
-
As a switch to use the relay contact on the meter.
-
As a data source for e-mobility load management
Target group: single-family and multi-family homes
General integration
For the integration, you need the cloud login credentials (username and password) as well as the serial number of the meter. The serial number is shown directly in the smart-me portal and on the devices themselves. Only use the digits before the hyphen of the serial number!
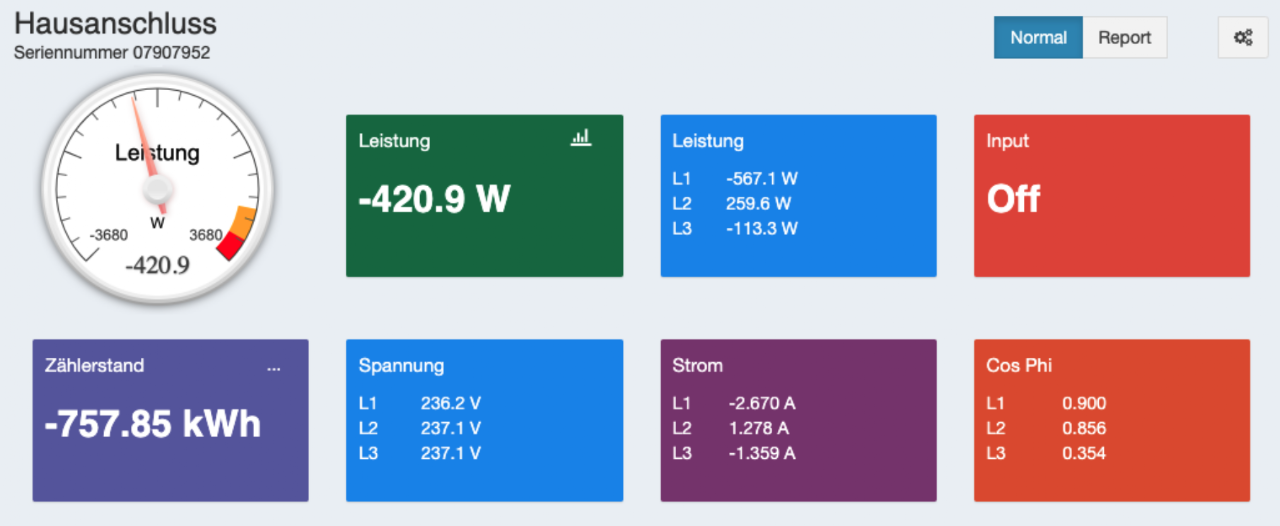
Example:
Serial number in web portal: 07907952
Serial number on meter: 07907952-123 (omit -123)
smart-me meter as a smart meter
A smart meter can be added in Solar Manager. It can be installed in two ways:
-
Directly after the utility meter (balancing meter), where production (-) and consumption (+) are measured directly
-
Consumption measurement only, with production recorded separately
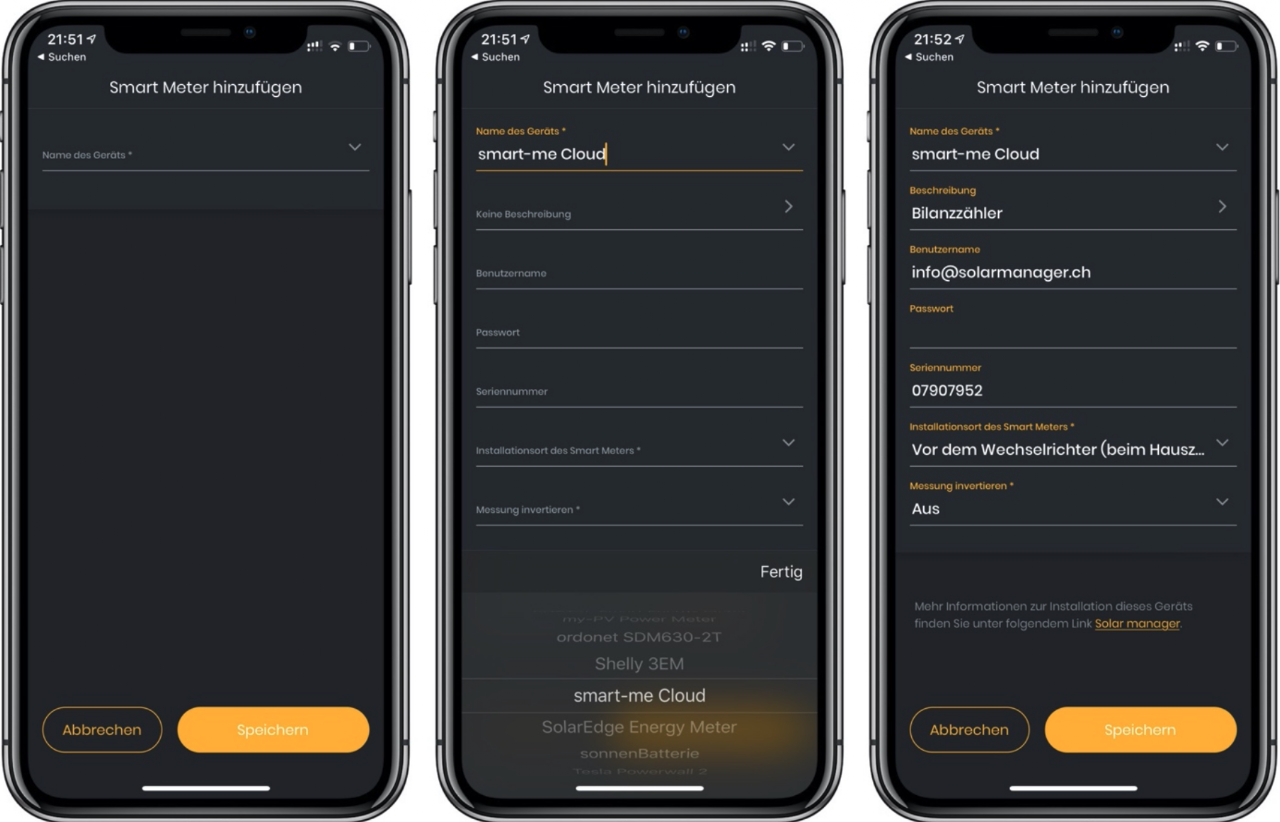
To set it up, add a smart meter and select smart-me Cloud. The smart meter is connected using the login credentials and the 8-digit serial number.
-
Installation location: As described above
-
Invert measurement: If the meter were installed inverted, you could change the sign here.
Using the smart-me relay
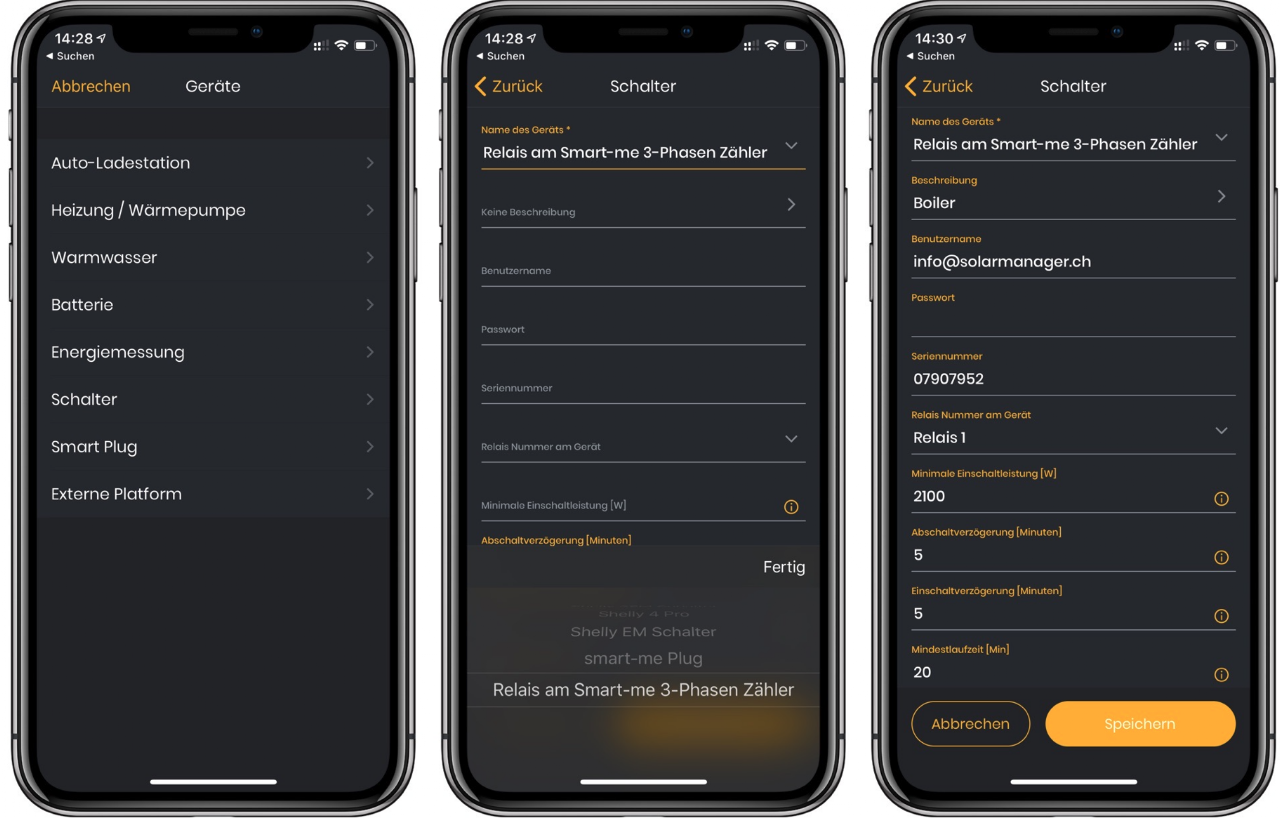
The 3-Phase Meter Telstar has two potential-free contact outputs for controlling external devices, one of them with an integrated 8A relay. This can be switched in Solar Manager. One «switch» is created and configured per relay. The switches must first be defined as digital outputs in the smart-me portal (see Inputs & Outputs)
To set it up, add a new «switch» under devices and select «Relay on the smart-me 3-phase meter». The meter is connected using the login credentials and the 8-digit serial number.
Parameters
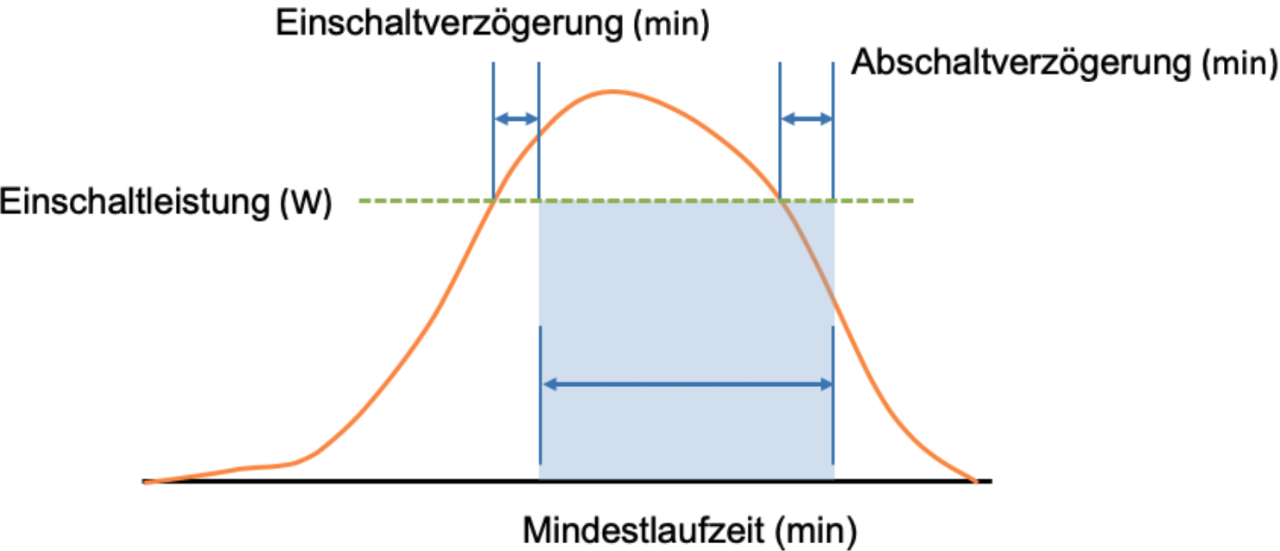
Switch-on power (W):
How much surplus power must be available for switching to take place.
Switch-on delay (min):
How long the defined power must be available before switching takes place.
Switch-off delay (min):
How long to wait after the power drops below the threshold before switching off (e.g. to bridge a passing cloud)
Minimum runtime (min):
The minimum time the device must run. Useful for heat pumps with compressors, etc.
Contact:
Schlyffistäg 36, CH-5630 Muri
https://www.solarmanager.ch/ · info@solarmanager.ch · +41 56 512 92 08
FAQ
Current release for Pico charging station does not work from 4200W
The Pico charging station is delivered with a default minimum current of 8A so that all possible vehicle types are supported directly after installation.
In combination with Solarmanager, however, the latter assumes a minimum current of 6A by default to control the Pico.
Select the case that applies to your vehicle to support your desired configuration without errors:
Case A: You have a vehicle that can handle a 6A starting current
- Set the minimum current on the Pico hardware to 6A.
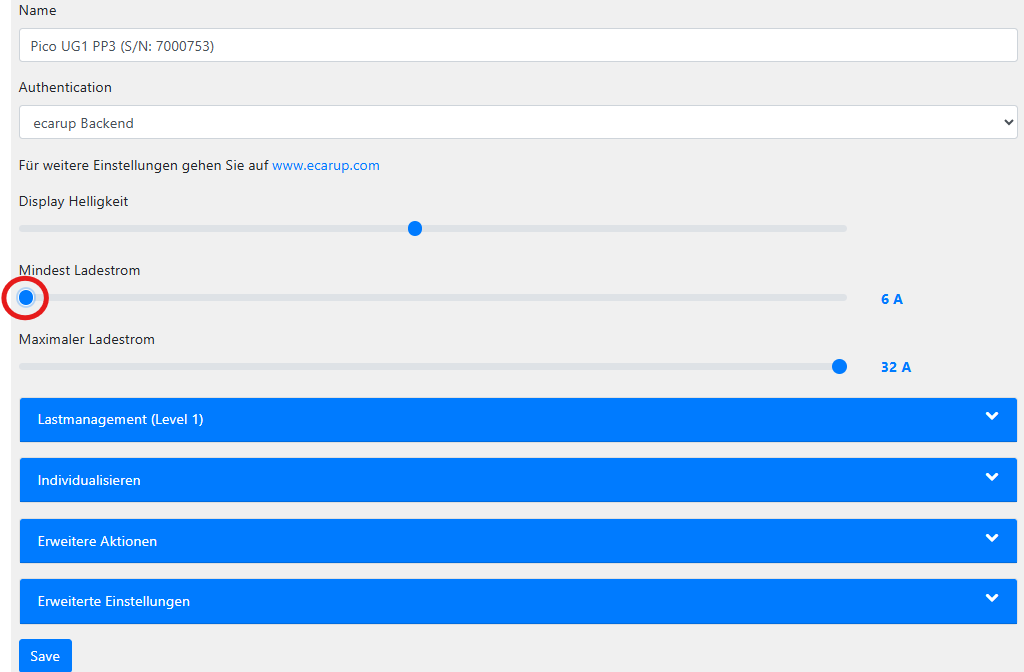
Case B: You have a vehicle that is known not to cope with a 6A starting current (e.g. Renault Zoe)
- In Solarmanager, select the setting "Renault Zoe 9A" in the vehicle selection