Loxone
Using smart-me meters in Loxone
Integration via Modbus
The template provides a way to read meter data directly from the meter.
-
Prerequisite: Modbus TCP must be enabled on the meter. The IP or the DNS name of the meter must be entered in the template.
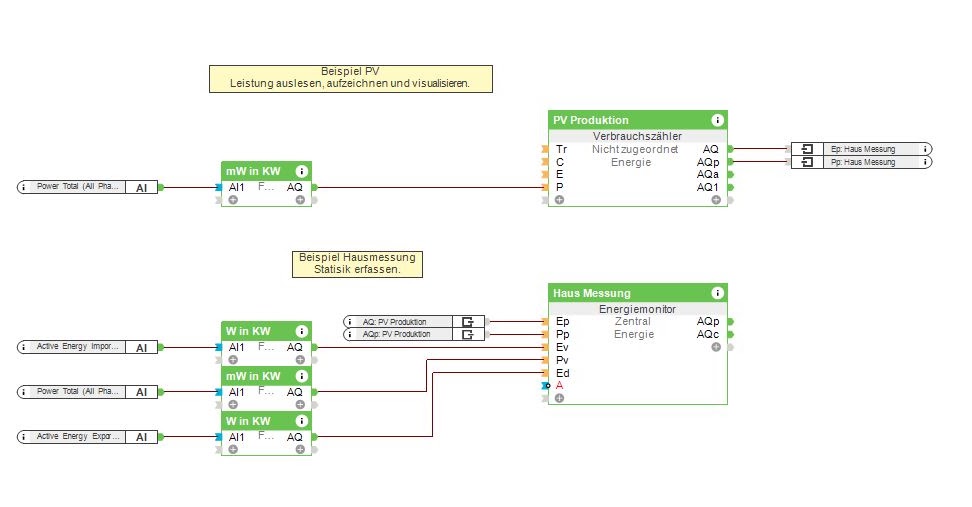
Integration via API - Basic Auth (deprecated)
The template provides a way to read meter data from our cloud and to control digital outputs.
Note: Basic Auth is being switched off to meet growing security requirements.
Only possible until November 2026 (up to v.1.0.2)
In the template, the user name and password of the account must be placed in front of the URL of the API call. Depending on the case, the user name must be set by smart-me.
Integration via API - API keys (recommended)
The template provides a way to read meter data from our cloud and to control digital outputs.
Note: Loxone does not offer a simpler way to handle API keys. The procedure described below was developed together with Loxone. API keys were introduced to meet growing security requirements.
from version 1.0.3
1. Create an API key in the smart-me portal.
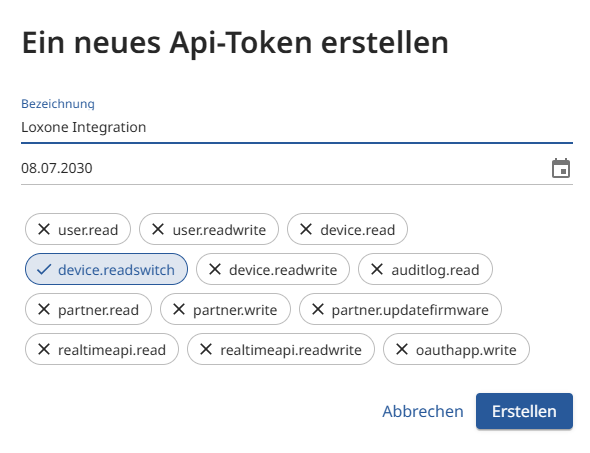
Log in to the smart-me portal --> menu Interfaces (Schnittstellen) --> API --> Click the "link" in the orange banner at the top --> "Create new" ("Neu erstellen").
- Give the API key a name, e.g. Loxone,
- Set the expiry date
- Set the permissions. For Loxone, "device.readswitch" is sufficient (if the browser automatically translates it into German, please use "Gerät.LesenSchalten")
- Create
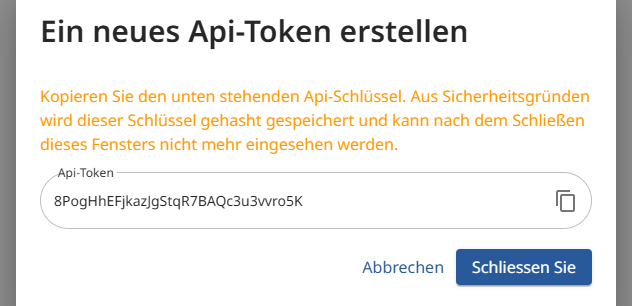
- Copy the API key. Caution: The key cannot be retrieved again afterwards.
- The API key is needed later.
General: More information on the permissions: API
2. Get the DeviceID of the smart-me meter
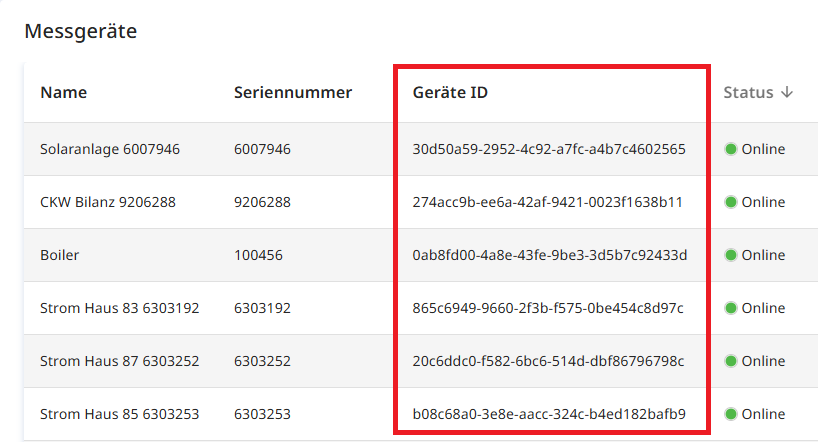
If the account is on Professional, the DeviceID can be found easily
- Menu System (System) --> System Health (Systemgesundheit)
- Search for devices
- The device ID is used later. e.g. 61c71d00-3d40-4963-745b2-7c6b0c512gf3
If the account is not licensed, the DeviceID must be retrieved via the API.
- Press the Windows key and type "cmd". 2. Open the command prompt 3. Copy the following command into the prompt.
Caution: Adjust the ApiKey.
curl -X "GET" "https://api.smart-me.com/Devices" -H "accept: */*" -H "Authorization: ApiKey n9CUnYCGmTOQZCCX1iHRqrF5Erzx9pUu"
4. In the response, search for the meter name and copy out the Id.
3. Configure the virtual output in Loxone
- Download the template from the Loxone Library (VO_XXXX). (See link above)
- In the Loxone periphery tree, click on Virtual Outputs
- In the Loxone menu at the top, load the smart-me Request under "Predefined Devices".
- A new virtual output appears; click on the command "Meter" there.
- In the field "Command for ON", <meter.id> must be replaced with the device ID.
- In the field "HTTP header for ON", <apikey> must be replaced with the API key. Note: The API key can be the same for every meter of the same account.
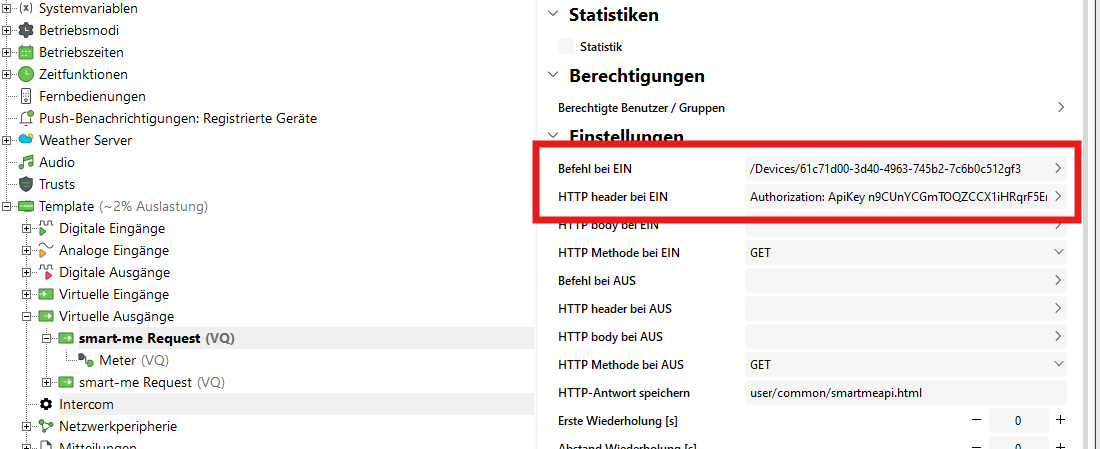
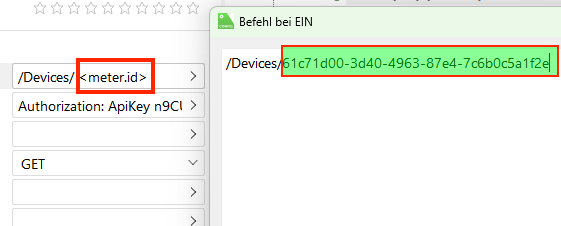
- In the field "Save HTTP response", the text smartmeapi.html must be adjusted.
- The name must be unique for each output (i.e. each meter).
- e.g. bilanz.html for the balance meter user/common/bilanz.html

4. Configure the virtual input in Loxone
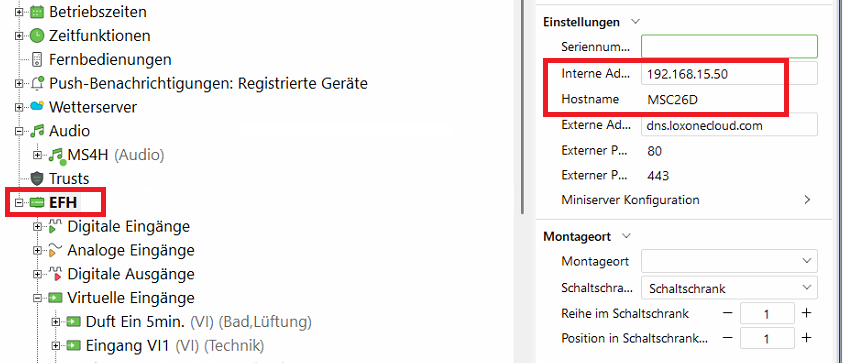
- Select the properties of the Loxone Miniserver. There you will find the host name or the IP address of the Miniserver. This is required for the further configuration.
-
Download the template from the Loxone Library (VI_XXXX).
-
Under "Predefined HTTP Devices", load the smart-me meter.
-
A new virtual input appears
-
Click on the input "smart-me meter".
-
In the field "URL", the following items must be adjusted.
- Login credentials of the Loxone Miniserver
- Host name or IP of the Loxone Miniserver
- Name of the stored HTML file. For the same command, the same name as above is required. e.g. bilanz.html.
-
Example of a command:

5. Connect the pulse generator to the virtual output
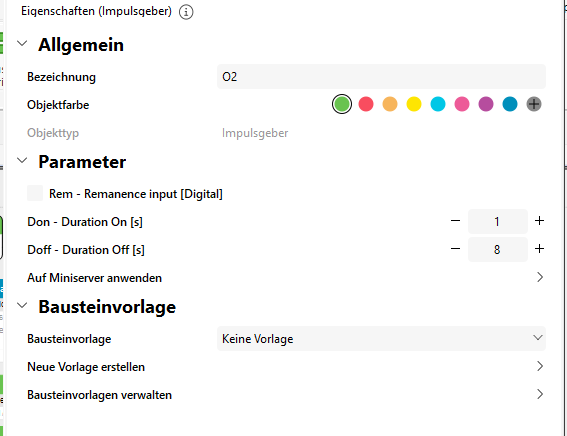
If the Example Meter is not used, the "virtual output command" must be triggered by means of a pulse generator.


Using Loxone meters in smart-me
The module provides a way to send meter data to our cloud.
Important: This module is not developed by smart-me. We do not provide support for it. You have to acquire the knowledge needed to use this module yourself, and in our view it is intended for advanced Loxone users.
These instructions only give a brief overview of how a metering point can be created, which is not done via the Loxone module.
-
Create an API key in the smart-me portal with the claims: device.readwrite and user.readwrite (only one key per account is needed, not one for each meter)
-
Execute the following call (edit the fields beforehand (ApiKey & Name)) With PowerShell: curl -i -X 'POST' 'https://api.smart-me.com/Devices' -H 'accept: text/plain' -H 'Authorization: ApiKey <apikey>' -H 'Content-Type: application/json-patch+json' -d '{"activePower": 0, "counterReading": 0, "counterReadingExport": 0, "valueDate": "2025-07-08T08:15:55.026Z", "name": "Loxone Beispiel", "deviceEnergyType": 1}'
With Windows CMD (DOS): curl -i -X POST "https://api.smart-me.com/Devices" -H "accept: text/plain" -H "Authorization: ApiKey <apikey> " -H "Content-Type: application/json" -d "{\"activePower\": 0, \"counterReading\": 0, \"counterReadingExport\": 0, \"valueDate\": \"2025-12-05T00:00:00.000Z\", \"name\": \"Loxone Beispiel\", \"deviceEnergyType\": 1}"
-
Take the UUID of the meter from the response. Alternative 1: Get the UUID from System Health (Systemgesundheit) in the dashboard Alternative 2: Use https://api.smart-me.com/Devices GET to obtain all IDs.
-
This data must be entered in the Loxone Library.
In summary, a meter was created via the API in this way, which can then be used in Loxone.